

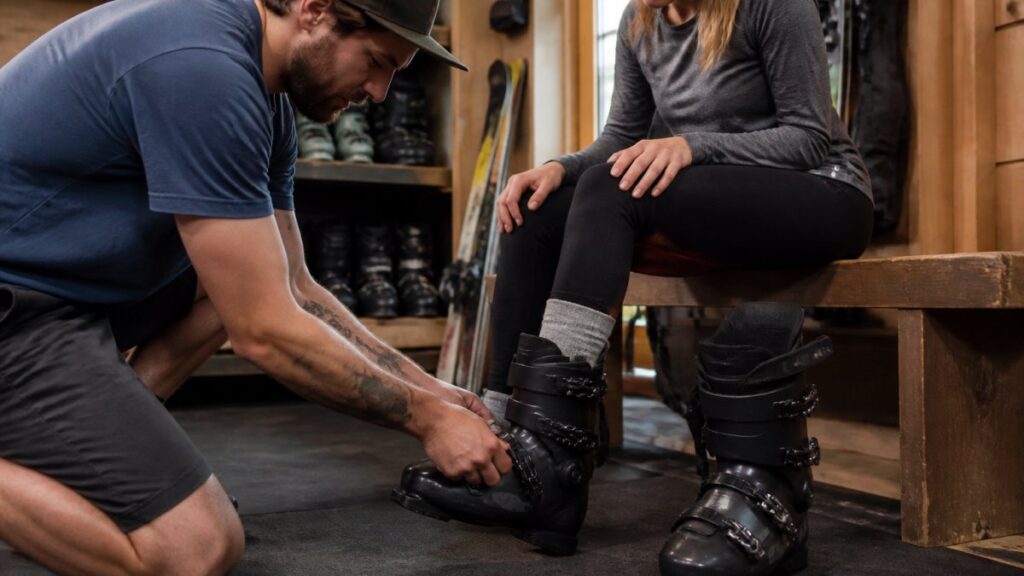
Table of Contents
- Start With the Right Sock and a Clean Shell Check
- How to Put On Ski Boots Without Pinching or Slop
- How to Buckle Ski Boots in the Right Order
- How Tight Should Ski Boots Be? Snug Versus Painful
- The At-Home Fit Check: Heel Hold, Forefoot, and Instep
- Troubleshooting Pressure Points, Toe Room, and Calf Pain
- Ski Boot Fitting Cost: What Adjustments Run and When to Pay for Them
- Frequently Asked Questions
Last Updated: October 19, 2026
Start With the Right Sock and a Clean Shell Check
Most skiers blame the boot for a bad day on the hill. Before you learn how to fit ski boots comfortably, start with what goes inside them.
Wear one thin, synthetic ski sock. Wool blends and polyester move moisture and hug the foot without folding.
Now check the shell itself. Pull the liner out and look inside for grit, old footbed debris, or a collapsed heel pocket.
Pro Tip
Bring the exact socks you plan to ski in when you get fitted. Thickness changes the fit by a few millimeters, which is enough to matter.
Bring the exact socks you plan to ski in when you get fitted. Thickness changes the fit by a few millimeters, which is enough to matter.
How to Put On Ski Boots Without Pinching or Slop
The right way to put on ski boots is to open the shell wide, slide the foot in with the heel first, and seat the heel hard against the back before you touch a buckle.
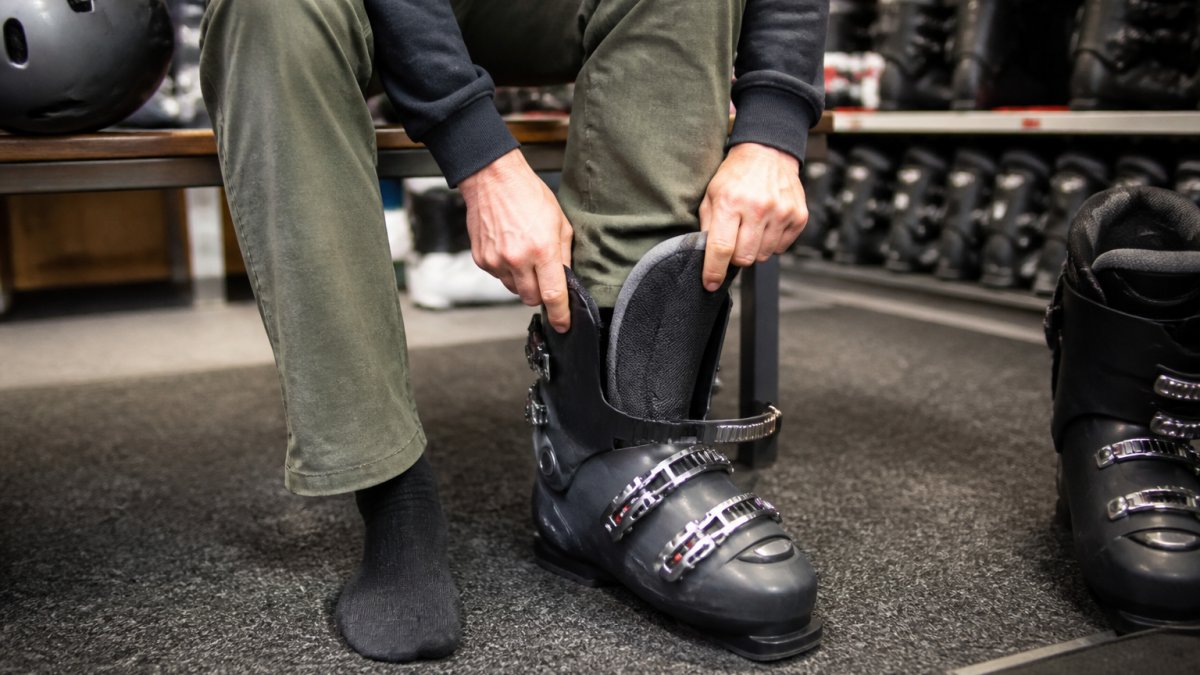
Here is the sequence to follow:
- Unbuckle every buckle and pull the tongue fully forward.
- Slide your foot in with your heel aimed at the back of the shell.
- Grab the tongue and pull it forward and up while you press down.
- Stand up and stomp your heel into the floor two or three times.
- Reach back and confirm the heel is locked into the pocket.
That heel stomp is the step people skip. Without it, your foot sits forward in the shell, your toes jam the front, and the whole boot feels wrong. Seat the heel first, then buckle.
How to Buckle Ski Boots in the Right Order
Buckle ski boots from the bottom up, starting with the buckle closest to your toes and finishing with the one across your shin. Buckling top-down pushes your heel out of the pocket and creates shin pressure.
Follow this order:
- Lower buckle: snug, not cranked. This holds the forefoot.
- Middle buckle: firm. This locks the instep and heel.
- Upper buckle: light. This one only closes the cuff.
A common mistake is cranking the top buckle to fix a loose heel. That never works. If your heel lifts, tighten the middle buckle or add a heel wedge, not the top strap.
Watch Out
Over-tightening the top buckle cuts circulation and causes shin bang by the afternoon. If your toes go numb on the lift, that buckle is too tight.
Over-tightening the top buckle cuts circulation and causes shin bang by the afternoon. If your toes go numb on the lift, that buckle is too tight.
How Tight Should Ski Boots Be? Snug Versus Painful
Ski boots should feel snug and firm, like a handshake, not painful. You want your foot held in place with no slop, but you should still wiggle your toes and feel your circulation.
The difference between snug and too tight comes down to feel:
| Feel | Snug (correct) | Too tight (wrong) |
|---|---|---|
| Toes | Can wiggle slightly | Numb or cramped |
| Heel | Locked, no lift | Lifts when you flex |
| Instep | Firm pressure, no pinch | Sharp pressure point |
| Shin | Even contact | Bruised after one run |
A snug fit holds your foot so it does not slide. Painful tightness comes from over-buckling or a shell that is too small. If you feel a sharp point, that is a pressure point, not a fit.
The At-Home Fit Check: Heel Hold, Forefoot, and Instep
You can test ski boot fit at home before you ever reach the lift. The trick is to run the checks in a fixed order, shell first, then liner, then heel hold, then flex, and to score each one pass or fail instead of guessing. Do this on a carpeted floor with the exact socks you ski in.
Step 1: The Shell Fit (Liner Out)
Pull the liner out of the shell. Slide your bare foot in and push your toes until they lightly touch the front. Now look at the space behind your heel.
- Pass: roughly one to one-and-a-half fingers of space behind your heel (about 0.4 to 0.6 inch).
- Fail, too big: two fingers or more. The shell will let your foot slide and your heel will lift no matter how you buckle.
- Fail, too small: less than one finger, or your toes curl to fit. No amount of liner work fixes a shell that is short.
This shell-fit gap is the single most important number in boot fitting. If it fails, stop, the boot is the wrong size and the rest of the tests do not matter.
Step 2: The Liner and Instep Check
Put the liner back in, step into the boot, and buckle to a snug baseline (bottom buckle snug, middle firm, top light). Run a finger over the top of your foot and press down along the instep.
- Pass: firm, even contact with no sharp point and no numbness after two minutes.
- Fail: a distinct hot spot, tingling, or toes going cold. That points to a thick sock, an over-tight middle buckle, or a high instep that needs a roomier shell or a heat-moldable liner.
Step 3: The Heel Hold Test
With the boot buckled, rise onto your toes and then settle back down. Watch and feel the heel.
- Pass: the heel stays planted, with no more than a slight settle, a couple of millimeters at most.
- Fail: the heel lifts visibly or you feel it slide up the back of the shell. Tighten the middle buckle one notch and retest. If it still lifts, the shell is too big or the heel pocket does not match your heel shape.
Step 4: The Forefoot and Toe Test
Stand neutral and press your toes against the front of the boot.
- Pass: toes lightly brush the front with the heel seated; you can still wiggle them.
- Fail: toes jam hard, curl, or go numb. First re-seat the heel (stomp it back) and retest. If they still jam in a shell that passed Step 1, the liner is pushing your foot forward, a footbed or liner change is the next move, not a bigger boot.
Step 5: The Forward-Flex Test
Stand tall, then flex forward as if you are skiing, knees over toes, shin pressing into the tongue.
- Pass: the shell wraps your lower leg and heel tighter, your shin meets even resistance, and your heel presses deeper into the pocket.
- Fail: your foot slides forward and your toes jam, or your heel lifts when you lean. That slosh means the boot is too big or the flex is wrong for your foot shape.
Score all five steps. A boot that passes shell fit, liner, heel hold, forefoot, and flex is the right size. A fail on Step 1 cannot be fixed by buckling, everything downstream is wasted effort until the shell is right.
Troubleshooting Pressure Points, Toe Room, and Calf Pain
Almost every ski boot problem traces to one of a handful of spots. The useful skill is not memorizing symptoms, it is mapping each symptom to its likely cause and knowing the safe next step. Work through this table before you touch a buckle or reach for a tool.
| Symptom | Likely cause | Safe next step |
|---|---|---|
| Numb or cold toes | Top or middle buckle over-tightened; thick sock; low cuff cutting circulation | Back the top buckle off one notch, switch to a thin synthetic sock, retest after five minutes |
| Toe bang (toes jam the front) | Heel not seated; shell too short; liner pushing foot forward | Stomp the heel back and retest; if it persists in a shell that passed the shell-fit check, see a bootfitter |
| Instep pressure or hot spot | Over-tight middle buckle; high instep against a low shell; bunched sock | Loosen the middle buckle one notch, smooth the sock, retest; persistent pressure needs a liner or shell adjustment |
| Shin pain (shin bang) | Top buckle cranked hard; stiff flex; low cuff digging into the shin | Loosen the top buckle and power strap, flex forward to check even shin contact |
| Heel lift | Shell too big; heel pocket shape mismatch; no footbed | Tighten the middle buckle one notch; add a footbed; if it still lifts, the shell is wrong |
| Sixth-toe pinch (outside of foot) | Bony bump rubbing the shell | A bootfitter can punch the shell out at that spot, do not attempt at home |
| Calf pain | Cuff height too low for a larger calf; top buckle too tight | Loosen the upper buckle, check cuff height against your calf; a cuff spacer or different boot may be needed |
What You Can Fix at Home
Sock choice, buckle order and tension, heel seating, and a footbed swap are all fair game. These are reversible and cost nothing. If a change does not help within a few minutes of standing and flexing, undo it, do not keep cranking buckles hoping the pain goes away.
What Needs a Bootfitter
Shell punches, grinding, liner molding, and canting are not home projects. A punch stretches the shell at one specific point; done wrong it weakens the shell or creates a new pressure point. The same goes for heat-molding a liner, too much heat and the liner packs out permanently. If a pressure point survives a sock change and a buckle adjustment, that is your signal to book a fitter.
Foot Shape Changes the Answer
A high instep needs a roomier shell or a heat-moldable liner. A narrow heel needs a snug heel pocket plus a custom footbed to stop sliding. Wide forefeet often need a shell punch at the sixth toe. Beginners tend to size up for comfort and end up with slop; advanced skiers accept a tighter shell and a break-in period because control matters more than instant cushion.
Do not try to fix a pressure point by grinding or punching the shell yourself. Shell modifications are one-way, a mistake cannot be undone, and a punched shell may no longer hold your foot correctly.
A custom footbed supports your arch and stops your foot from spreading, which resolves most heel-lift and toe-bang complaints without changing the shell. Try a footbed before you consider a new boot.
Ski Boot Fitting Cost: What Adjustments Run and When to Pay for Them
Ski boot fitting cost depends on how much work your boots need. A basic alignment and buckle adjustment is the cheapest.
Pricing depends on the boot and the work. Check with your shop for current rates before you commit.
When should you pay a professional instead of adjusting at home? Use this rule:
- Adjust at home: sock choice, buckle order, heel seating, and minor buckle tension.
- See a bootfitter: persistent pressure points, heel lift that buckles cannot fix, toe bang in a correctly sized shell, or calf pain that returns every run.
If you are renting, tell the fitter about hot spots before you leave the shop.
Learning to fit ski boots takes a little patience, but the payoff is a full day on the mountain without throbbing feet.
Frequently Asked Questions
How tight should ski boots be when I first put them on?
A new boot should feel snug all over, with your heel locked down and your toes just brushing the front when you stand tall. You should be able to wiggle your toes but not lift your heel. If you can slide a whole hand behind your calf or your foot moves side to side, the boot is too loose. If your toes go numb or you feel a sharp pinch within a minute, it is too tight. Expect a slight break-in period as the liner packs out.
How much does ski boot fitting cost?
Cost depends on what you need. Ask for an itemized quote before work starts, and confirm whether follow-up adjustments are included. Prices vary by shop, so call ahead or check the shop’s website for current rates.
Should my toes touch the front of my ski boots?
When you stand upright, your toes should lightly brush or just barely touch the front of the liner. That contact disappears when you flex forward into a skiing stance, because your foot slides back slightly in the boot. If your toes are curled or jammed hard against the front while standing, the boot is too short. If there is a finger’s width of empty space, it is likely too long and you will lose heel hold and control.
When should I see a professional ski boot fitter instead of adjusting at home?
See a fitter if you have tried thinner socks, rebuckled in the correct order, and still get sharp pressure points, numbness, or heel lift that will not go away. Also book a fitter if you have a wide forefoot, a high instep, very narrow heels, or a significant size difference between feet, since these usually need shell work. Persistent shin or calf pain after a run is another sign. A fitter can punch, grind, or add padding that you cannot do safely yourself.