

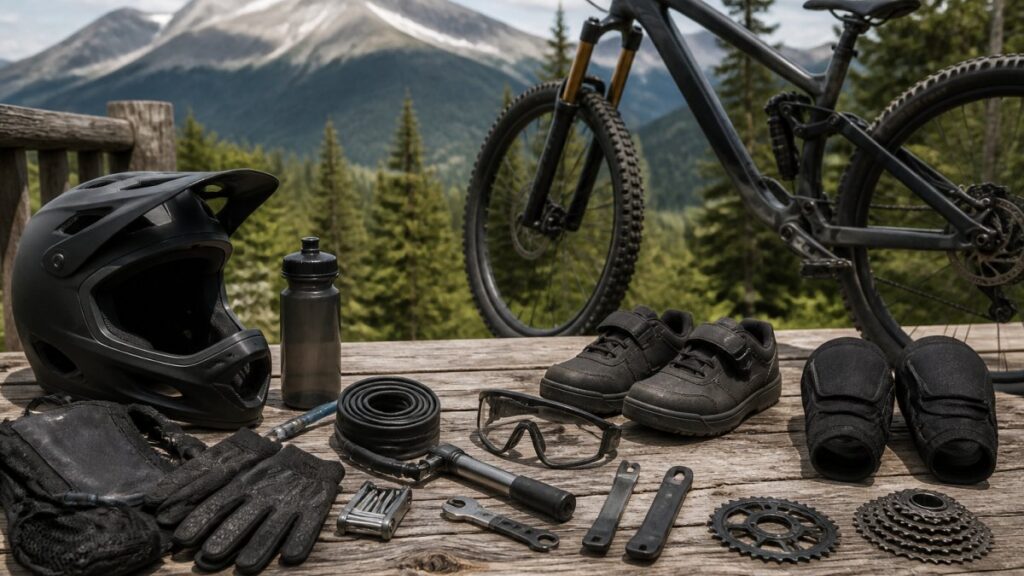
Table of Contents
- Best Mountain Bike Gear for Breckenridge: What Actually Matters
- Mountain Bike Gear Checklist: The Prioritized Packing List
- What to Wear Mountain Biking at 9,600 Feet
- Mountain Bike Protective Gear: Helmets, Pads, and Gloves
- Breckenridge Mountain Bike Rentals: How to Choose and Fit Your Bike
- Ride Essentials: Hydration, Footwear, and Trailside Repair
- Matching Gear to Trail Difficulty and Rider Skill Level
- Conclusion
- Frequently Asked Questions
Last Updated: October 18, 2026
Best Mountain Bike Gear for Breckenridge: What Actually Matters
Breckenridge sits at 9,600 feet, and that single fact reshapes every gear decision you’ll make before clipping in. The best mountain bike gear for Breckenridge is not the same kit that works in Denver or Moab: thinner air, fast-moving afternoon storms, and rocky high-alpine trails punish the wrong choices.
Below, we break down what to pack, what to rent, and how to match gear to the trails you’ll actually ride. Most guides list products. We’ll tell you what earns its place in your bag at altitude.
Why Altitude and Rocky Terrain Change Your Gear List
Altitude is the variable most riders underestimate. At 9,600 feet, the air holds less oxygen, so climbs feel harder and you dehydrate faster than at lower elevations. That makes hydration gear and breathable layers more important here than raw bike spec.
The terrain adds its own demands. Local trails mix loose rock, roots, and sustained climbs, which rewards grip, tire width, and a bike with enough suspension to absorb chatter.
Pro Tip
If you’re arriving from lower elevation, plan your hardest ride for day two or three, not day one. Your lungs need time, and a shorter warm-up ride on a mellow trail will tell you more about how you’re adapting than any gear upgrade.
If you’re arriving from lower elevation, plan your hardest ride for day two or three, not day one. Your lungs need time, and a shorter warm-up ride on a mellow trail will tell you more about how you’re adapting than any gear upgrade.
Mountain Bike Gear Checklist: The Prioritized Packing List
A mountain bike gear checklist should separate what you truly need from what is just nice to have, then adjust for the specific demands of high-altitude riding. At 9,600 feet, the consequences of being underprepared are higher: help is farther away, weather turns faster, and dehydration sets in sooner. Pack the essentials first, then add comfort items if you have room.
Essentials (do not ride without these):
- Helmet rated for trail use
- Gloves
- Eye protection (sunglasses or clear lenses)
- Hydration pack or bottles with enough water for 2+ hours
- Multi-tool with chain breaker
Nice-to-haves:
- Knee pads for technical descents
- Extra insulating layer for temperature swings
- Phone mount or map case
- Small first-aid kit
- Emergency blanket or bivy
Essentials vs. Nice-to-Haves
The split matters because overpacking slows you down and underpacking leaves you exposed. On a short trail ride, essentials cover safety and self-rescue. Knee pads and extra layers move into essential territory the moment you plan a long descent or a ride that climbs above tree line. A first-aid kit and emergency blanket are nice-to-haves on a one-hour loop but become essential on a remote high-alpine route where cell service is spotty and afternoon storms are common.
| Category | Item | Why It Matters at Altitude |
|---|---|---|
| Essential | Helmet and gloves | Core protection on rocky trails |
| Essential | Hydration pack | Faster dehydration at 9,600 feet |
| Essential | Repair kit (multi-tool, tube, levers, pump) | Remote trails, limited cell service |
| Essential | Rain shell | Afternoon storms build quickly |
| Essential | Sunscreen and lip balm | Strong high-altitude sun exposure |
| Essential | Phone with offline maps and backup battery | Navigation and emergency communication |
| Nice-to-have | Knee pads | Extra confidence on descents |
| Nice-to-have | Extra layer | Temperature swings |
| Nice-to-have | First-aid kit and emergency blanket | Remote high-alpine rides |
Repair and Emergency Kit: What to Carry and Why
A flat tire or broken chain miles from town can turn a good ride into a long walk. Carry a multi-tool with a chain breaker, a spare tube sized to your wheel, tire levers, and a mini pump or CO2 inflator. A quick link for your chain and a few zip ties cost almost nothing and solve common trailside problems.
Pro Tip
If you are visiting and renting a bike, ask the shop what repair supplies are included and what you should add. Many rentals come with a tube and levers, but a pump or CO2 may not be included.
If you are visiting and renting a bike, ask the shop what repair supplies are included and what you should add. Many rentals come with a tube and levers, but a pump or CO2 may not be included.
Altitude and Weather Add-Ons
High elevation means stronger sun, cooler temperatures, and rapid weather changes. Add sunscreen and lip balm with SPF to your essentials, and carry a light rain shell even on a sunny morning. An extra insulating layer weighs little and makes the difference on a chilly descent or an unexpected storm. If you are arriving from lower elevation, plan your hardest ride for day two or three, not day one, and carry more water than you think you need.
What to Wear Mountain Biking at 9,600 Feet
What to wear mountain biking here comes down to layering, because the weather swings fast. Mornings can start cool and sunny, then a storm rolls in by early afternoon.
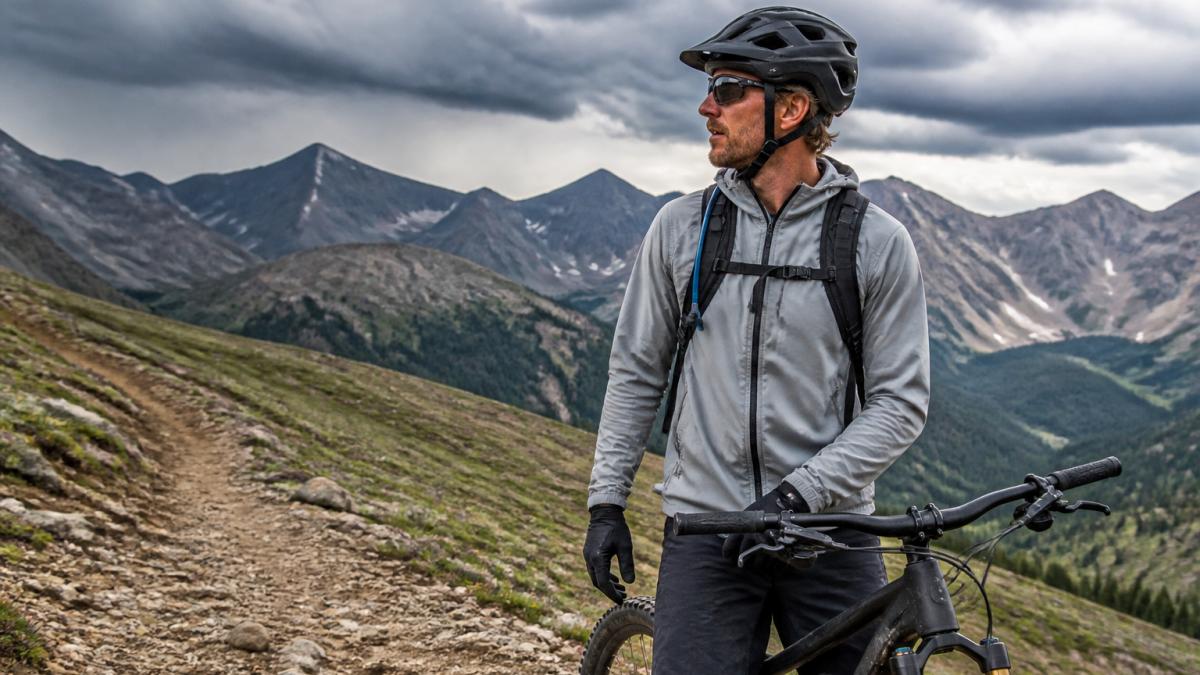
Start with a moisture-wicking base layer, add a light insulating layer for cool starts, and keep a packable rain shell on hand. Avoid cotton, which holds sweat and chills you on descents.
Layering for Fast Weather Swings
Think in three layers: base, mid, shell. The base moves sweat away from your skin. The mid traps warmth for chilly morning climbs. The shell blocks wind and rain when storms hit. On a warm afternoon you’ll ride in the base layer alone, with the other two stashed in your pack.
Mountain Bike Protective Gear: Helmets, Pads, and Gloves
Mountain bike protective gear starts with a properly fitted helmet and doesn’t stop there. A helmet is non-negotiable on every ride, and it should sit level on your head with the strap snug under your chin.
Gloves protect your hands and improve grip on rocky, jarring terrain. The helmet safety guidance from the Consumer Product Safety Commission is a useful reference for understanding what certified protection actually covers.
Watch Out
A loose helmet or one worn tipped back exposes your forehead and the base of your skull in a crash. Fit it before you leave the shop or rental counter, not at the trailhead.
A loose helmet or one worn tipped back exposes your forehead and the base of your skull in a crash. Fit it before you leave the shop or rental counter, not at the trailhead.
Breckenridge Mountain Bike Rentals: How to Choose and Fit Your Bike
Breckenridge mountain bike rentals solve the biggest gear problem visitors face: you can’t fly with a full-suspension bike easily, and buying one for a short trip makes no sense.
Choose by terrain and ability. A cross-country bike suits smoother, climbing-focused routes. An all-mountain or full-suspension bike handles rocky descents and technical terrain with more stability. Wheel size matters too: 29-inch wheels roll over obstacles well and carry speed, while 650b wheels feel more maneuverable in tight sections.
Rental Fit Checks Before You Ride
Fit turns a rental into a bike that actually works for you. Run through these before you roll out:
- Saddle height set so your leg is nearly straight at the bottom of the pedal stroke
- Reach comfortable, not stretched or cramped
- Brake levers angled for one-finger control
- Tire pressure adjusted for rocky terrain
- Suspension set for your weight
- Helmet fitted and strap snug
Ride Essentials: Hydration, Footwear, and Trailside Repair
Hydration, footwear, and a repair kit are the three ride essentials that decide whether a good day turns into a long walk. Carry more water than you think you need, wear shoes with real grip, and pack the tools to fix a flat.
A hydration pack keeps your hands free and carries water plus layers and tools. Mountain biking shoes with a stiff sole and grippy tread transfer power and keep your feet planted when you dab.
Key Takeaway
The single most common mistake we see is riders heading out with one bottle and no repair kit on a remote high-alpine trail. Carry water, a tube, and a pump every time.
The single most common mistake we see is riders heading out with one bottle and no repair kit on a remote high-alpine trail. Carry water, a tube, and a pump every time.
Matching Gear to Trail Difficulty and Rider Skill Level
Gear should scale with trail difficulty and rider skill level, not the other way around. The high country offers everything from smooth cross-country loops to rocky, technical descents, and the right bike and protection depend on which of those you plan to ride. Use the trail difficulty rating and your honest self-assessment to choose gear, and size up protection when the terrain gets more demanding.
Trail-to-Gear Matching
| Trail Type | Typical Difficulty | Recommended Bike | Key Gear |
|---|---|---|---|
| Smooth cross-country loops | Beginner | Hardtail or short-travel full suspension | Helmet, gloves, eye protection, hydration pack |
| Moderate singletrack with roots and rocks | Intermediate | Full suspension, 120-140mm travel | Add knee pads, repair kit, rain shell |
| Technical descents and rocky terrain | Advanced | Full suspension, 150mm+ travel | Full protective gear, including knee and elbow pads |
| Lift-served downhill | Expert | Downhill or enduro bike | Full-face helmet, full pads, neck brace consideration |
Beginners do best on smoother cross-country routes with a hardtail or short-travel bike and basic protection. Intermediate riders tackling rockier terrain benefit from full suspension and knee pads. Expert riders on technical descents want a downhill-capable bike and full protective gear. Be honest about your ability: a strong beginner can handle more than a first-timer, but pro-level lines demand skills that take seasons to build.
Rental Gear and Fit Considerations
If you are visiting for a few days, renting is often the practical choice: you cannot easily fly with a full-suspension bike, and buying one for a short trip makes little sense. Rentals let you match the bike to the trail and your skill level. When you pick up a rental, check the fit before you leave the shop: saddle height so your leg is nearly straight at the bottom of the pedal stroke, reach comfortable rather than stretched or cramped, brake levers angled for one-finger control, tire pressure adjusted for rocky terrain, and suspension set for your weight.
Best For
Riders visiting for a few days who want a properly fitted bike without shipping their own: reserve a rental matched to your skill and the trails you plan to ride.
Riders visiting for a few days who want a properly fitted bike without shipping their own: reserve a rental matched to your skill and the trails you plan to ride.
Budget and Experience Guidance
Beginners and visitors should avoid overspending on gear they will use once. Start with a well-fitted helmet, gloves, eye protection, and a hydration pack, then add knee pads and a repair kit as your riding progresses. Experienced riders upgrading gear should prioritize suspension quality, tire grip, and brake performance over cosmetic upgrades. If you are unsure which local trail fits your level, ask before you book, and let the shop match the bike and protection to the day’s conditions.
Conclusion
The right gear makes a Breckenridge ride safer and more fun, but matching it to altitude, terrain, and your own skill level is the part most riders skip. If you’d rather not haul your own bike or guess at fit, we can help. Carver’s Ski and Bike offers demo, performance, and sport-level rentals, local experts who match gear to your skill and conditions, and convenient online booking so you spend less time waiting and more time riding.
Frequently Asked Questions
What gear do I need for mountain biking in Breckenridge?
Start with a well-fitted mountain bike suited to rocky terrain, a certified helmet, gloves, and moisture-wicking clothing with a packable layer for afternoon storms. Add a hydration pack with at least 2 to 3 liters of water, knee pads for descents, grippy flat-pedal shoes, and a small repair kit with a tube, tire levers, and a multi-tool. Because the town sits near 9,600 feet, sun protection and electrolytes matter as much as tread. A written mountain bike gear checklist keeps you from forgetting the small items that ruin a ride.
Should I rent or bring my own mountain bike for Breckenridge?
Renting usually makes more sense for a short visit. Shipping a bike costs money and risks damage, and airlines charge fees each way. Breckenridge mountain bike rentals let you match the bike to the day’s terrain, whether that is a full-suspension trail bike for rocky descents or a lighter cross-country setup for longer climbs. Shops can also set sag, tire pressure, and fit for your weight and riding style. If you ride aggressively at home and visit often, bringing your own bike is worth the hassle.
Do I need a full-face helmet for lift-accessed mountain biking?
For downhill or park riding with lift access, a full-face helmet with a chin bar is the safer choice, and many parks require one for certain trails. For cross-country and moderate trail riding, a well-ventilated half-shell helmet certified to current standards is fine. If you plan to mix both, a convertible helmet with a removable chin bar covers both use cases without buying two helmets. Whichever you pick, check the fit: the helmet should sit level and stay put when you shake your head.
Are knee pads necessary for mountain biking in Breckenridge?
They are strongly recommended. Local trails mix loose rock, roots, and tight switchbacks, and most falls happen at low speed on uneven ground. Lightweight sleeve-style knee pads add little pedaling resistance and protect the joint that takes the most impact. Riders sticking to smooth, wide beginner paths can sometimes skip them, but anyone heading onto intermediate or expert terrain should wear them. Pair knee pads with gloves, since hands hit the ground first in most crashes.